Would you like to improve your real estate photography? In this post, you’ll discover some tips to shoot stunning real estate photos and attract 60% more potential buyers with professional-looking photos.
Tips on how to achieve professional real estate photos of home interiors and exteriors :
- Think commercial
- Organization is key. Plan every photo shoot in advance.
- Use good quality Camera gear and lightning equipment.
- Take care of details and attrezzo.
- Get the shot right in camera
- Improve your skills on Editing and Post Production of real estate photos.
Think commercial
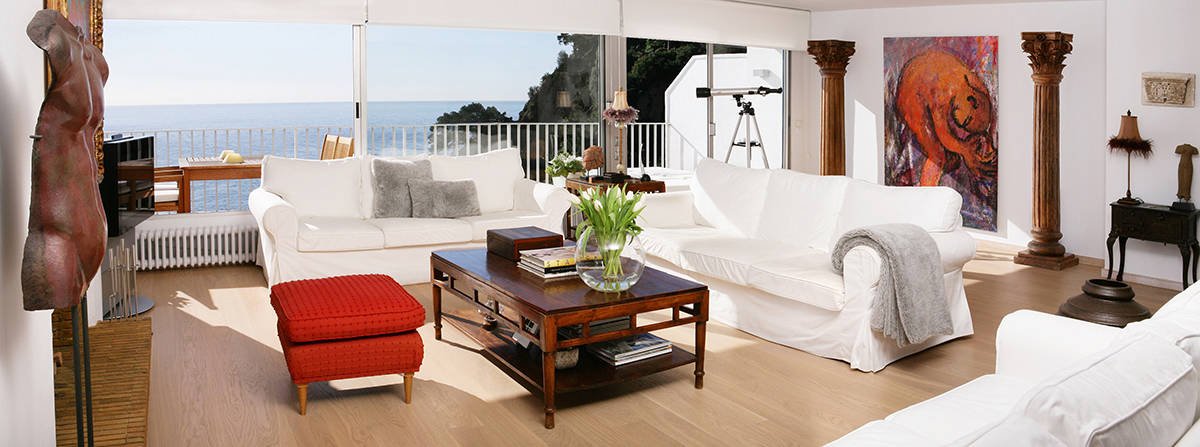
A beautiful picture always attracts people’s attention.
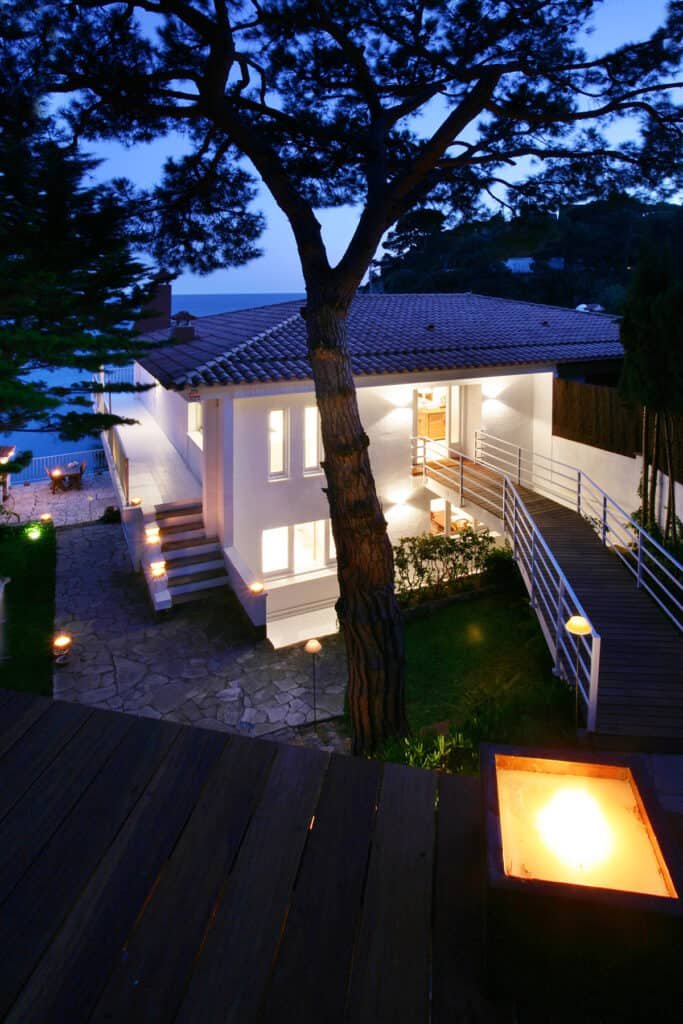
Professional-looking photos with good lighting are essential. I avoid shooting cinematic or artistic-looking shots for this subject as this approach could lead to fewer sales. Think of each property as a commercial ad.
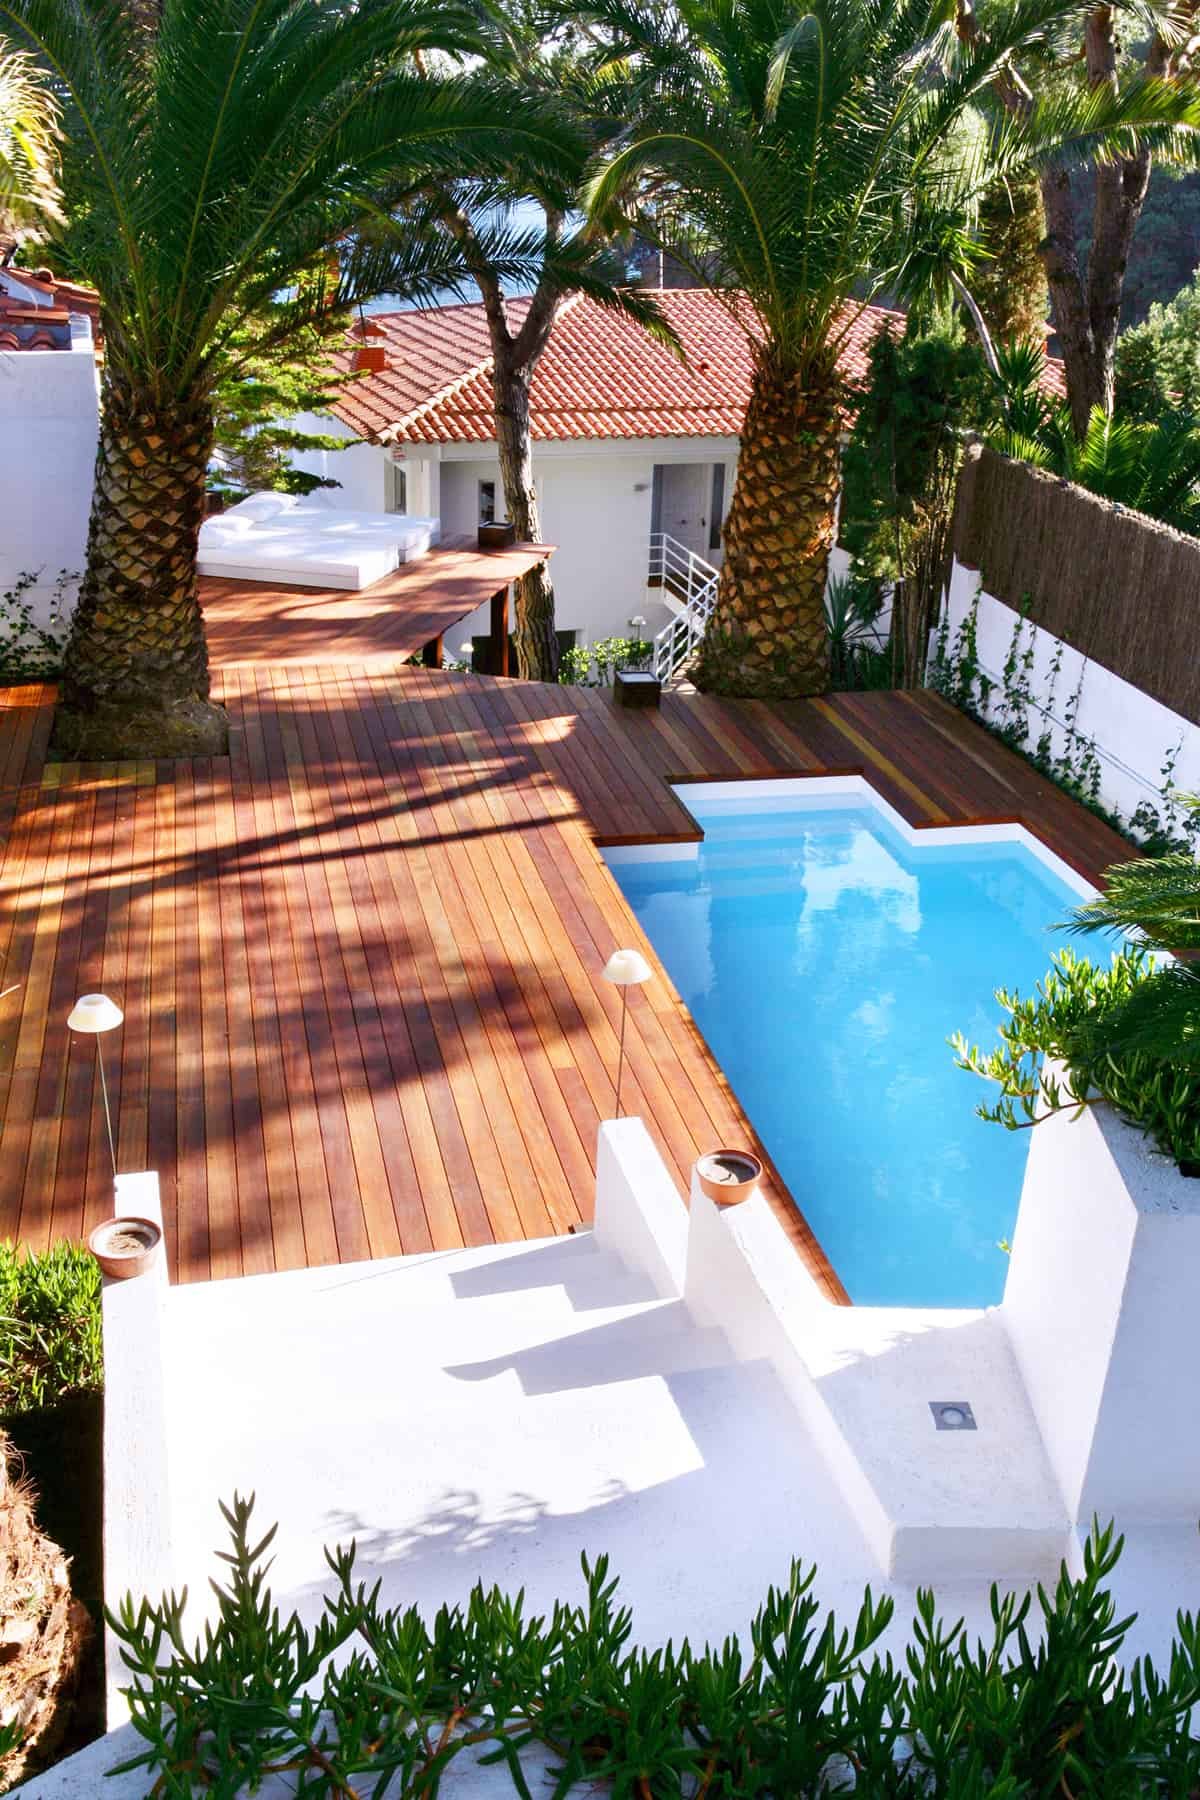
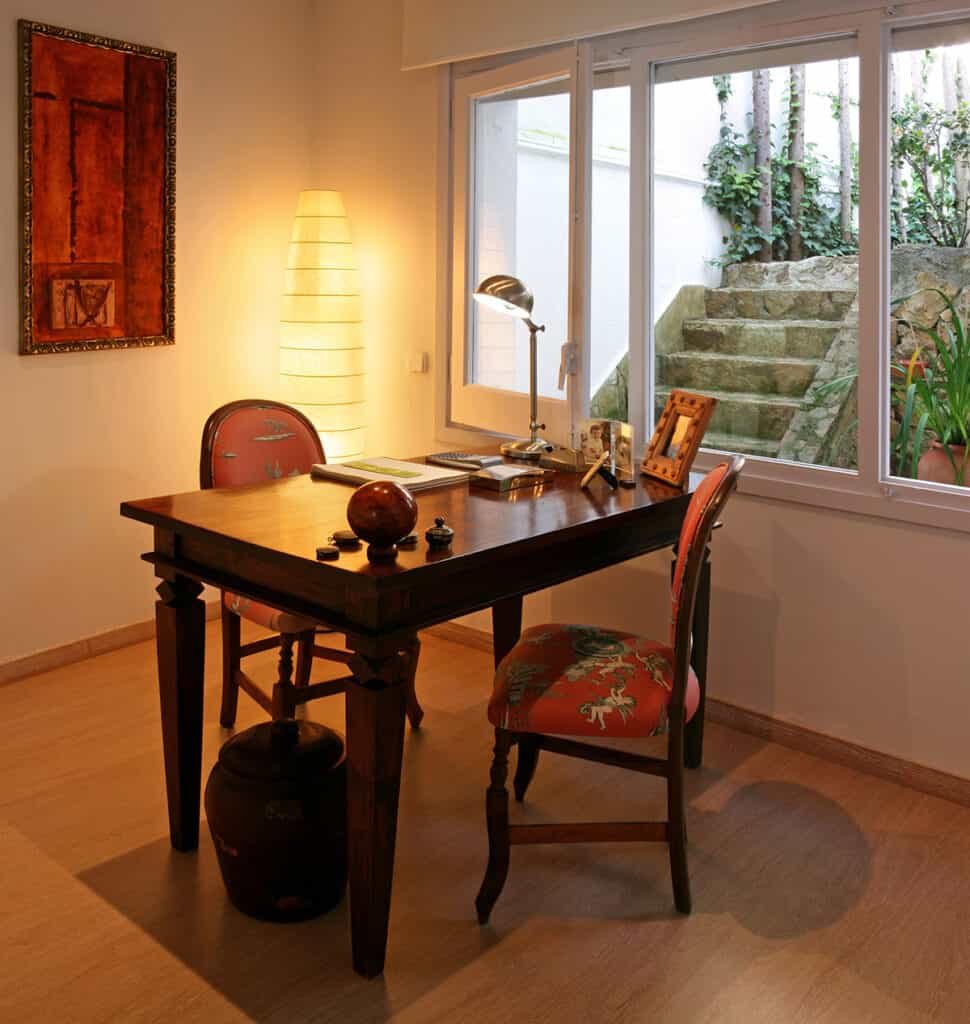
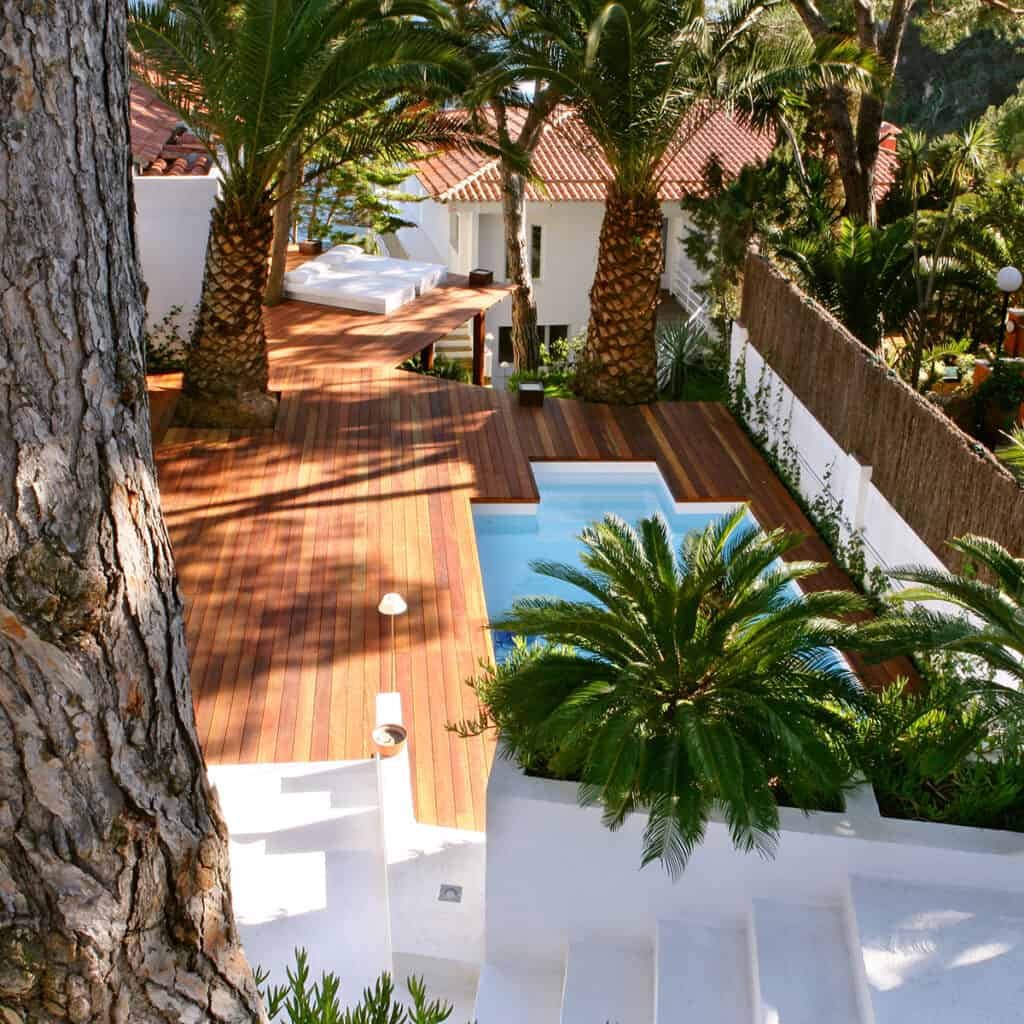
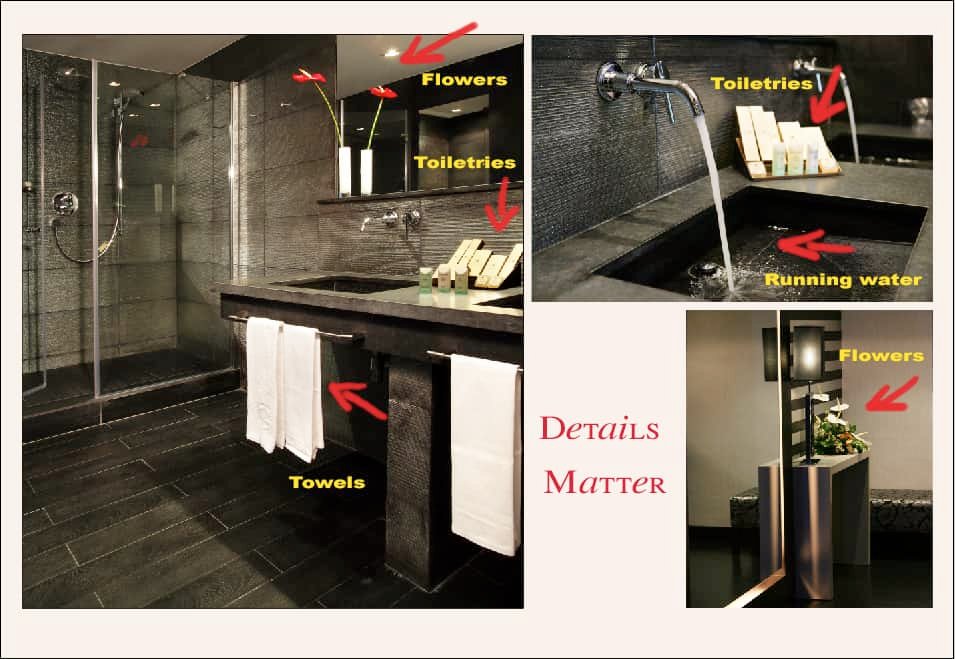
Details Matter and a little bit of nature like plants and flowers, a set table, books or any other attrezzo in the right spot would certainly make your images more interesting.
Another very important aspect of creating a successful photoshoot is post-production.
Editing your images in Photoshop or Lightroom correcting perspective, exposure, and the color is of vital importance. The look of the end result is what really matters to the public.
TIP: Avoid showing your unfinished photos to your clients. Especially new clients could be misled with dull and distorted images when seen for the first time.
Organization is key
Plan every photo shoot in advance.
If possible visit the property in advance. This could help you decide which time of the day to shoot and what focal length to use for each space.
Every property has different lightning conditions and knowing your life sources beforehand could help you organize the shoot.
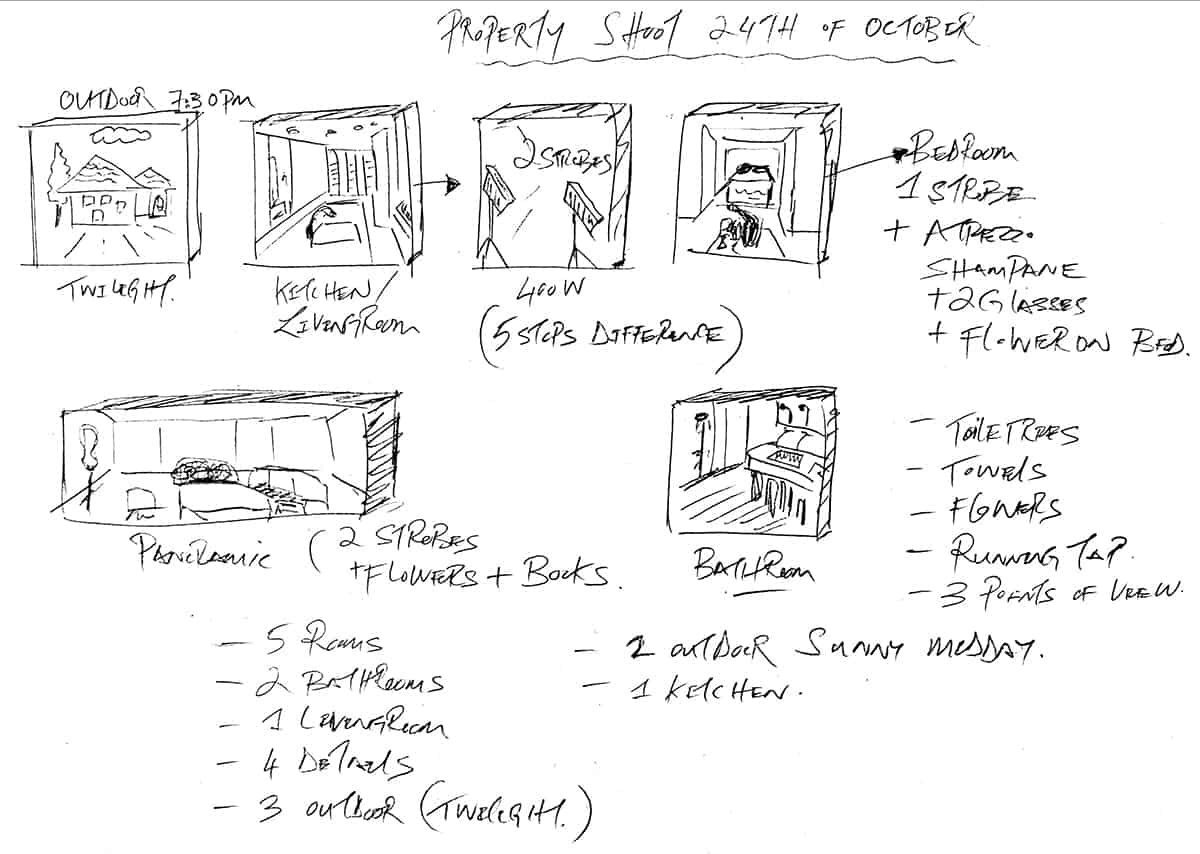
I like to create a little storyboard with sketches of each area with possible camera angles, light sources, and props. Your photoshoot will be more much more effective and agile if you know what to expect beforehand.
This could also prevent you from repeating the shoot.
Camera gear and lightning equipment
Using my smartphone is never an option as a final result but sometimes it certainly helps to preview some areas and certain lighting conditions.
It could also be very useful for creating behind the scene shots for social media. When you grab a smartphone and start shooting interiors you might think that it’s all you need to produce stunning results.
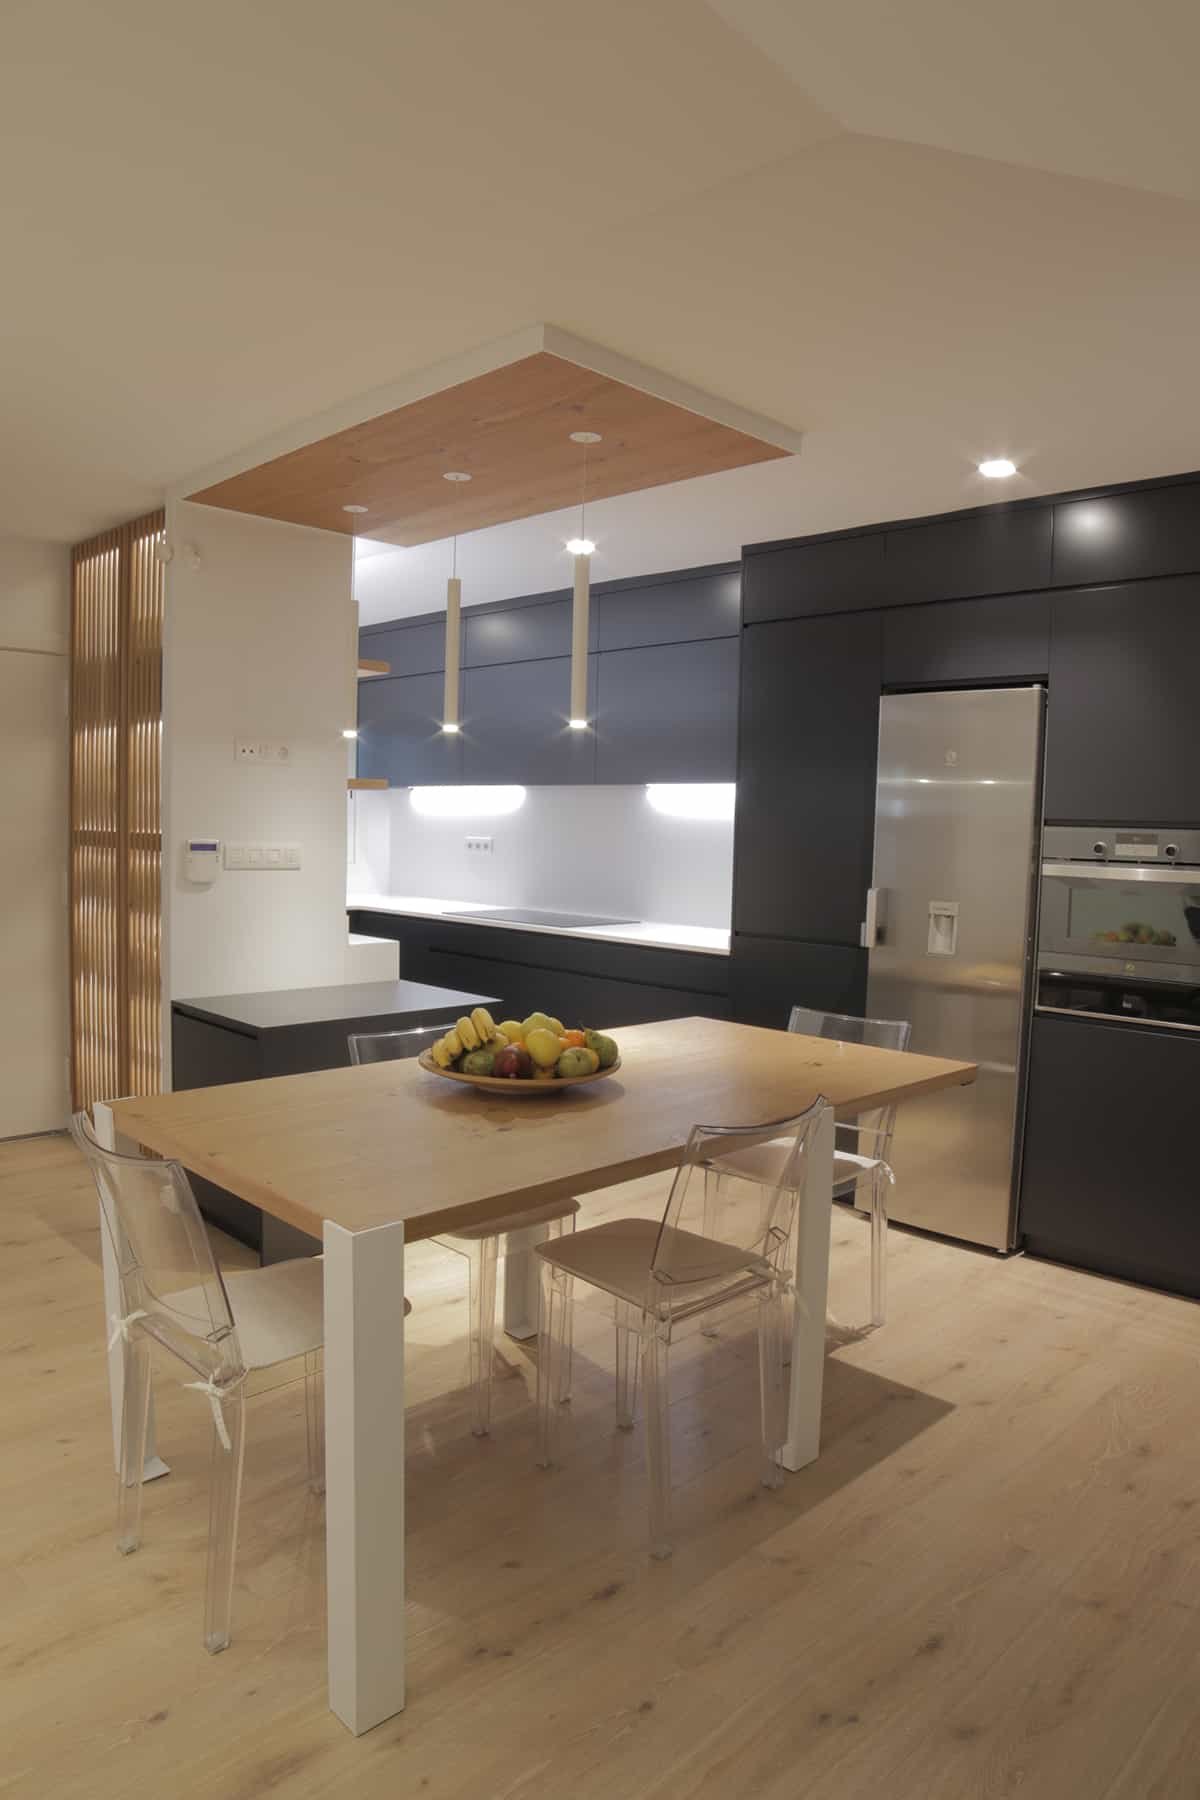
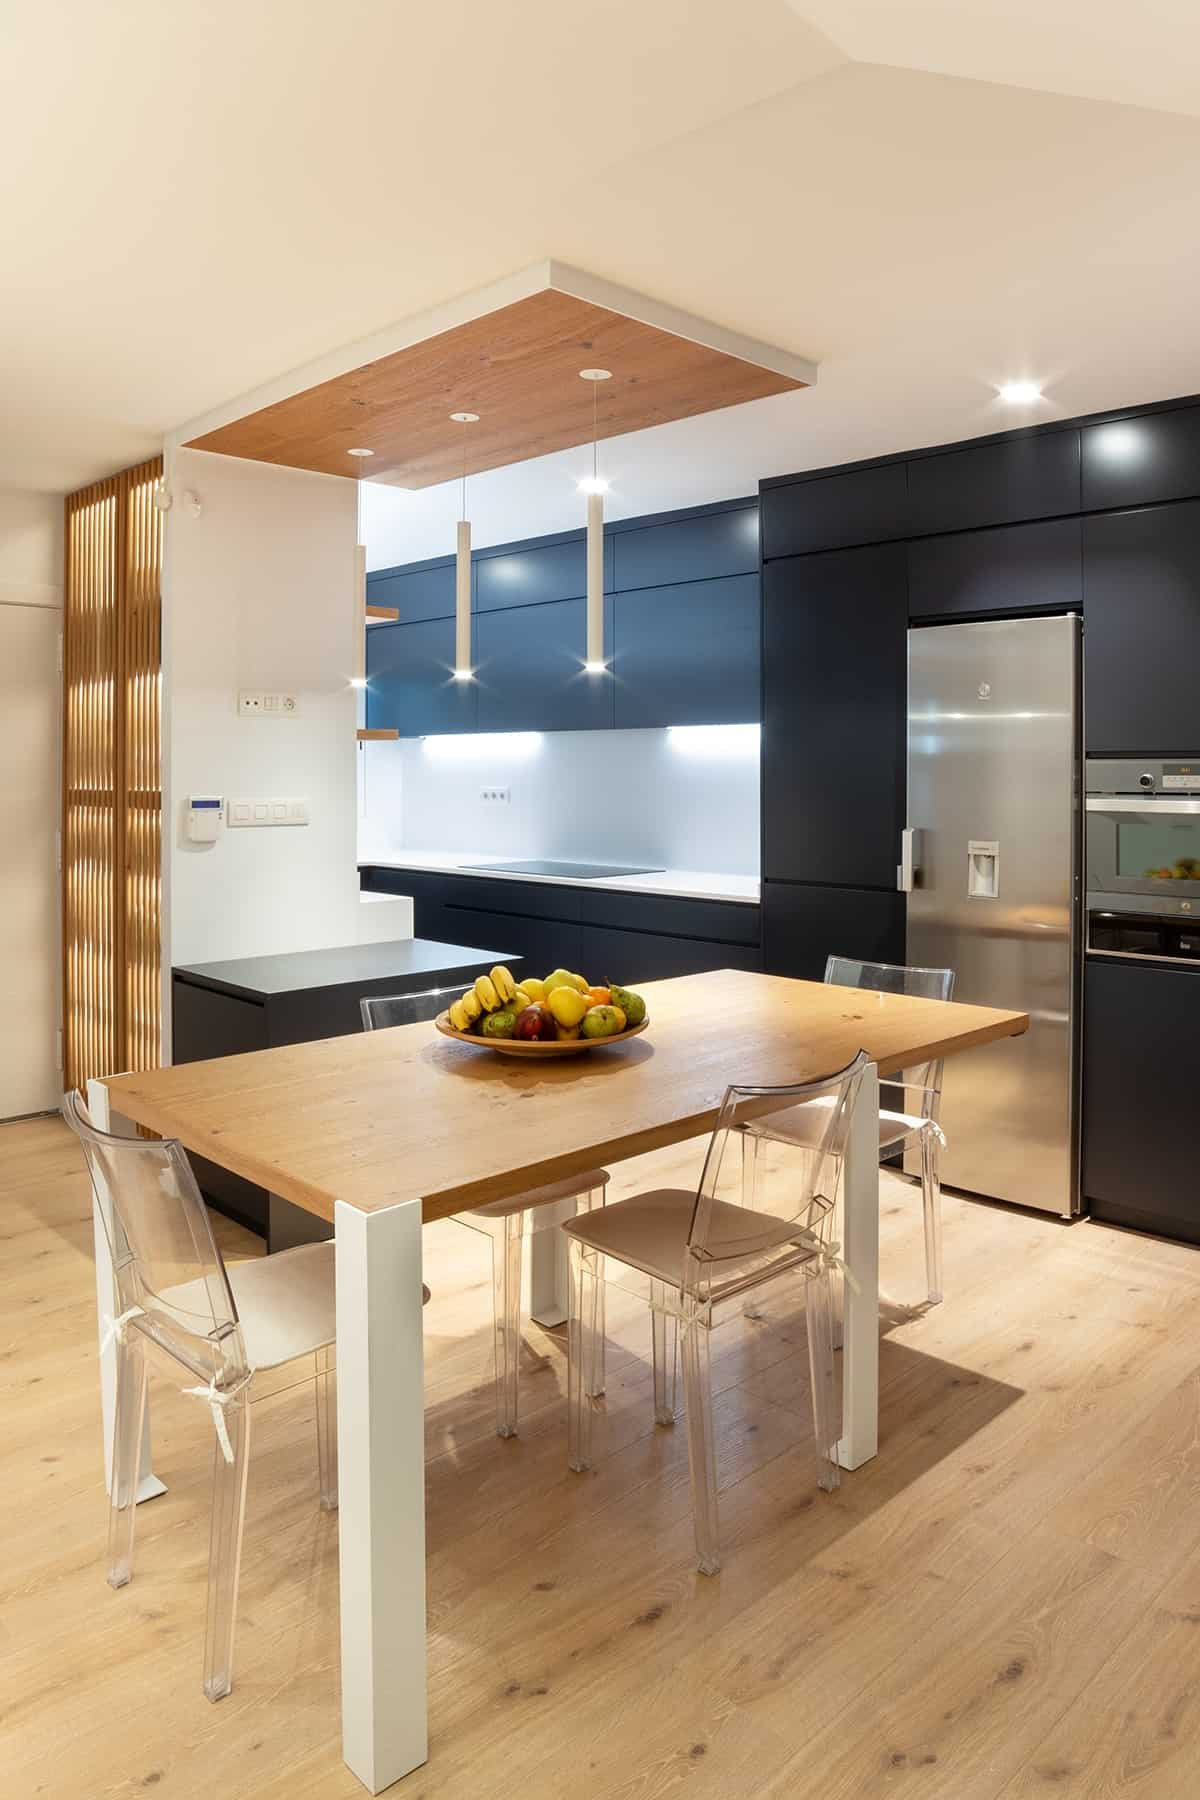
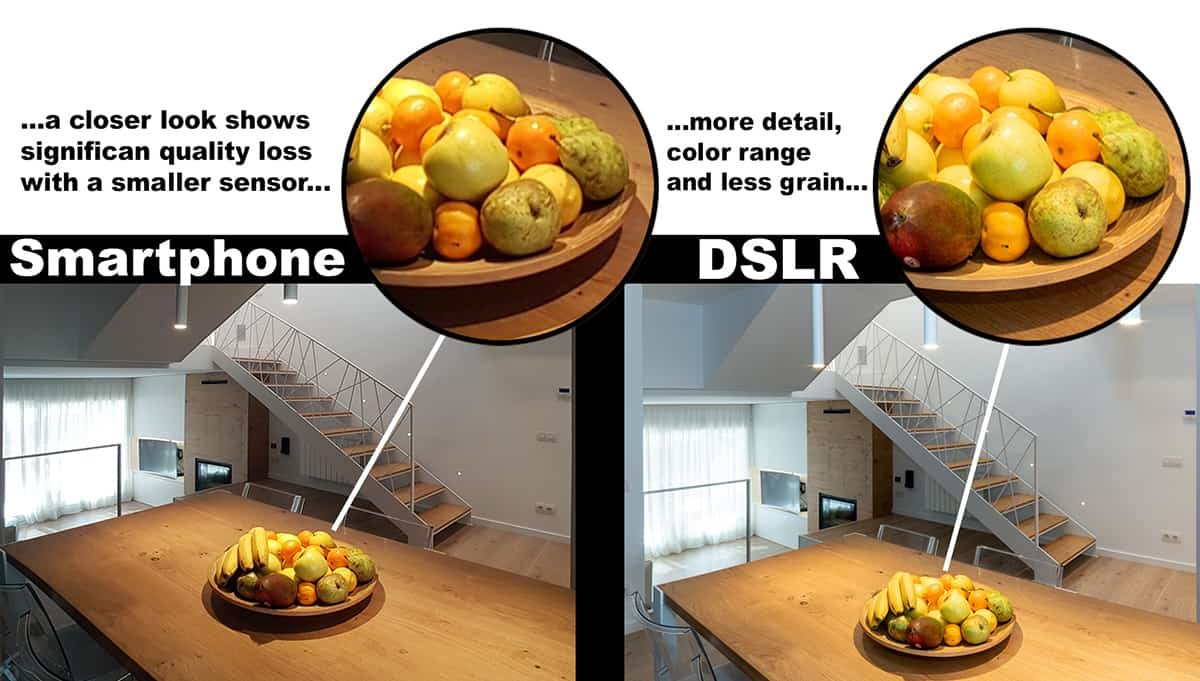
Reviewing photos on a 6.8in screen could be very misleading. Compare this DSLR Raw image and a Samsung Galaxy Smartphone image of the same interior.
( Image Above) The first noticeable difference is the image quality due to the resolution of each camera and the loss of detail ( poor latitude )in the smartphone capture.
When smartphone manufacturers boost the megabytes on their phones a lot of people get mislead.
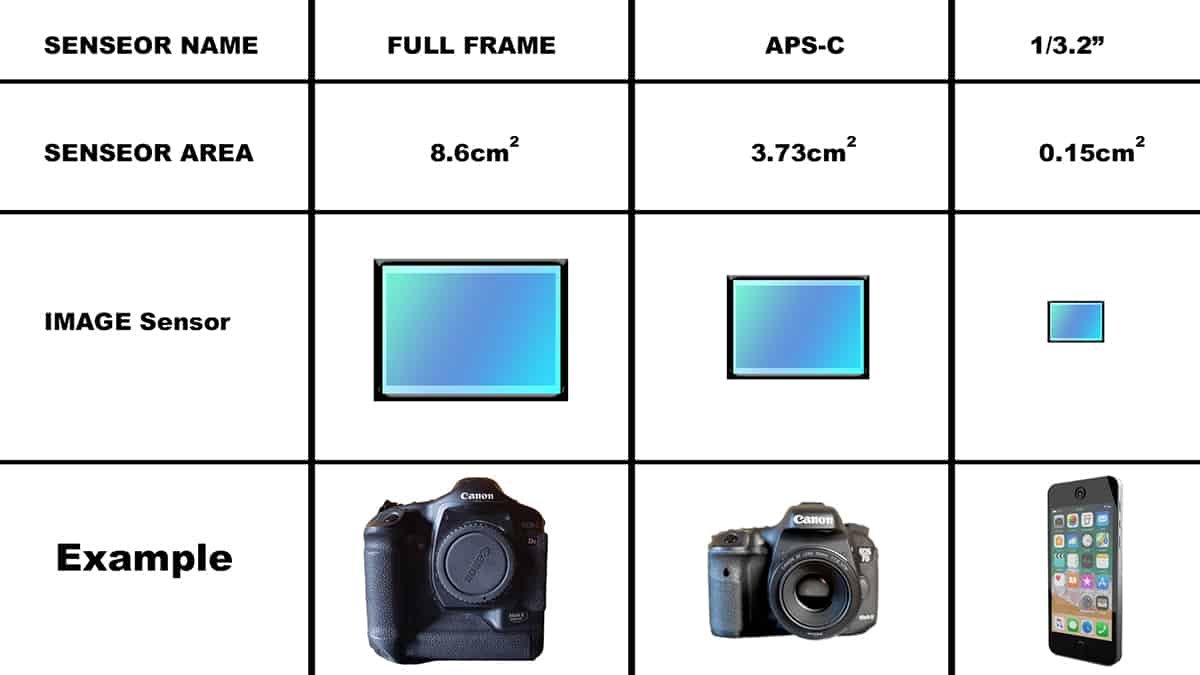
Smartphones have small image sensors compared to DSLR’s and that means less light passing through and more image noise especially with high ISO. A 20MB image on a smartphone and a 20MB image on a DSLR gives very different image quality results.
A small sensor means smaller squashed pixels that sacrifice image quality. The DSLR system offers more image, exposure, and an endless range of interchangeable high-quality lenses.
Smartphone cameras are very user friendly and are good for a lot of subjects but NOT good enough for high quality real estate photography.
You might want to use a high-resolution full-frame DSLR, APS-c DSLR, or even mirrorless cameras these days could do a good job.
Whether you are using a full-frame camera, Micro third, APS-C DSLR, or even a medium format camera it doesn’t really matter. ( Canon EOS 5D Mark IV, Canon EOS 7D Mark II, Fuji XT 4 )
These three options are valid for creating high-quality professional photos. Choosing the right lens for each frame is also important.
What is the best lens for real estate photography?
The first lens to consider would be a wide-angle lens. The Canon Ef-S 24Mm F/2.8 STM, Samyang 12 mm F2.0 NCS CS, Canon EF 16-35 mm f/42.8 L IS USM, or Fujinon XF 16mm F2.8 R WR to mention a few.
Good glass is always a good investment and common issues like lens flare and distortion will be less noticeable than budget wide-angle lenses.
I also use mid-range and even telephoto lenses on occasions for detail or outdoor shots. You’ll also need some kind of an external light source for balancing areas with different intensities.
What is the best lightning equipment for real estate photography?
The selection is endless and could be anything from a professional Studio Flash, a dedicated off-camera flash, or even LED lights. I use an Elinchrom D-Lite RX-400w and Elinchrom Ranger Quadra RX Hybrid Pro.
The ranger series is very compact and portable. I also make use of the Canon Speedlite 470EX-A1 and Speedlite 600EX 11-RT on occasions with Pocketwizard Flex TT5 transceiver and Pocketwizard Flex TT1 controller and transmitter for better control and off-camera positioning.
Ahh..and don’t even dream of not using a steady tripod like the Manfrotto 190 XPro Carbon witch is very lightweight. Although a bit heavy to carry around the Manfrotto 161MK2B Super Pro Tripod is steadier for outdoor windy conditions.
The last small accessory not no forget is the Lastolite EzyBalance Grey Card to get your white balance right from the start.
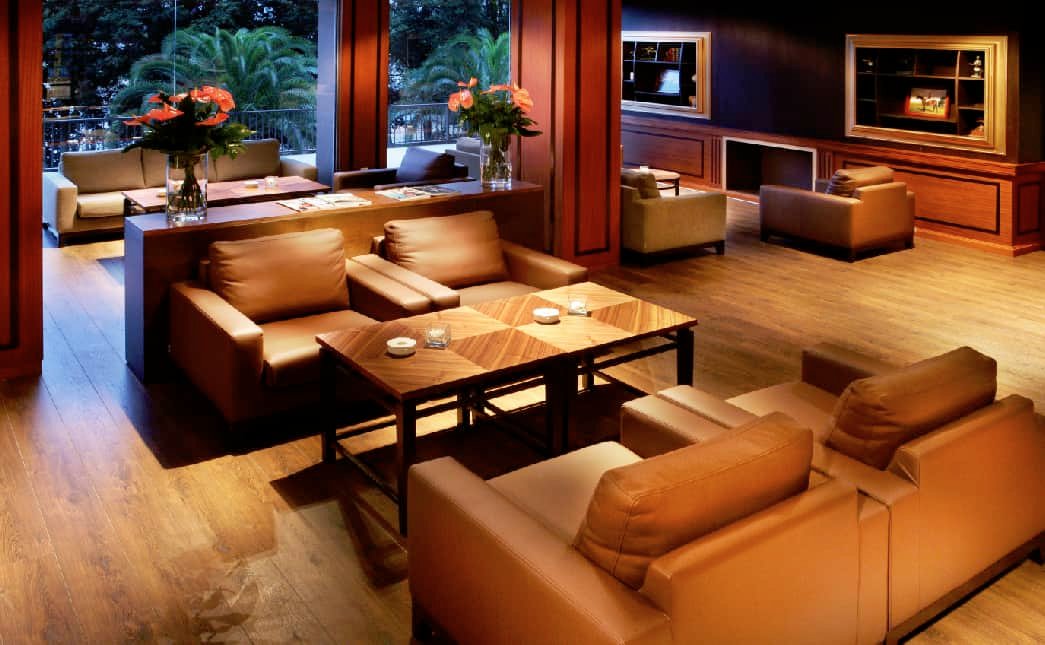
Details and attrezzo

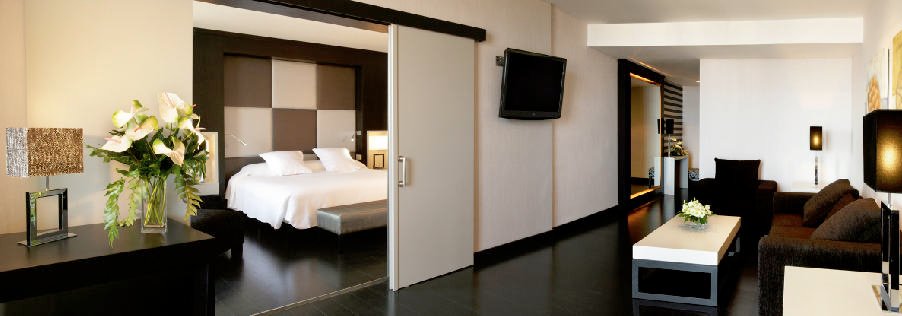
Small details certainly matter a lot. A must for me is using a little bit of nature to warm up a scene. For instance, a small pot plant or some flowers could give a little bit of warmth.
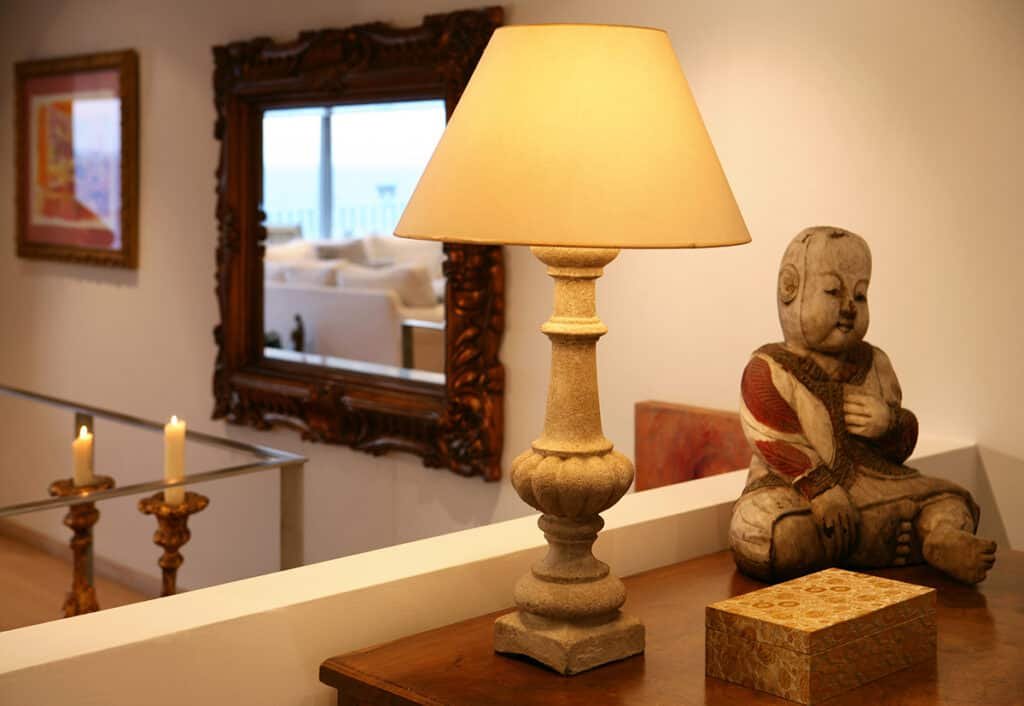
A pile of books in the living room or even a pair of red wine glasses in front of an open fireplace could suggest a romantic moment.
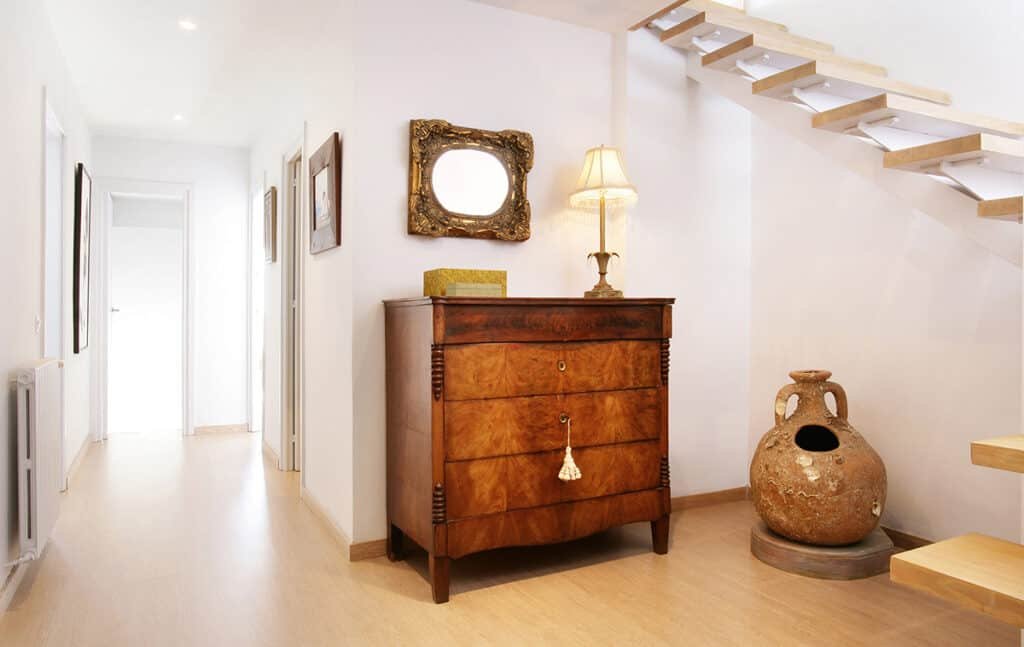
A fruit bowl in the kitchen and a set table instead of a boring empty table. Decorative objects contribute to the creation of unique spaces and add glamour to your pictures.
Get it right in camera
3 tips to get started.
1. The most valuable tip of all is to always shoot in RAW. I also always shoot in raw and jpeg. The jpeg images are only used for an agile overview after the shoot and the actual raw images are used for editing in Photoshop or Lightroom.
When only shooting jpeg you’ll always have some color or exposure issues and you won’t be able to correct any other artifacts effectively.
2. Another good tip for beginner photographers is to get each frame right in the camera. I don’t use any camera presets like sharpening, contrast, or color palettes.
Every parameter is set to 0 with the lowest contrast. This way I can capture the maximum dynamic range between shadows and highlights.
Avoid negative space to crop in post-production. Cropping an image, even a high-resolution image would lead to Quality loss.
3. Use a gray card for correct white balance. Let’s say you have 5 different rooms plus an exterior all with different light conditions on a property.
You might go crazy to correct each white area with a different white balance individually in post-production. Once your white balance is correct you can always warm-up or cool down the scene as needed.
The actual photo shoot
The very first thing to do is to declutter all areas.
As Leonardo da Vinci quoted “Simplicity is The ultimate sophistication”. Less is more.
Pay attention to every detail in the scene. Hideaway television cables, iron wrinkled beds, and hide any other objects that could distract people’s attention and contaminate the scene.
Only show the essential to the public. Take your time to light the scene. Bear in mind that not even the latest modern cameras like the Nikon D850 with a dynamic range of 14.8 EV beat our visual perception of up to 30 stops.
That’s the main reason why to be aware of creating harmony between highlights and shadows in your scene. The most effective way for me is to fill dark areas with electronic flash.
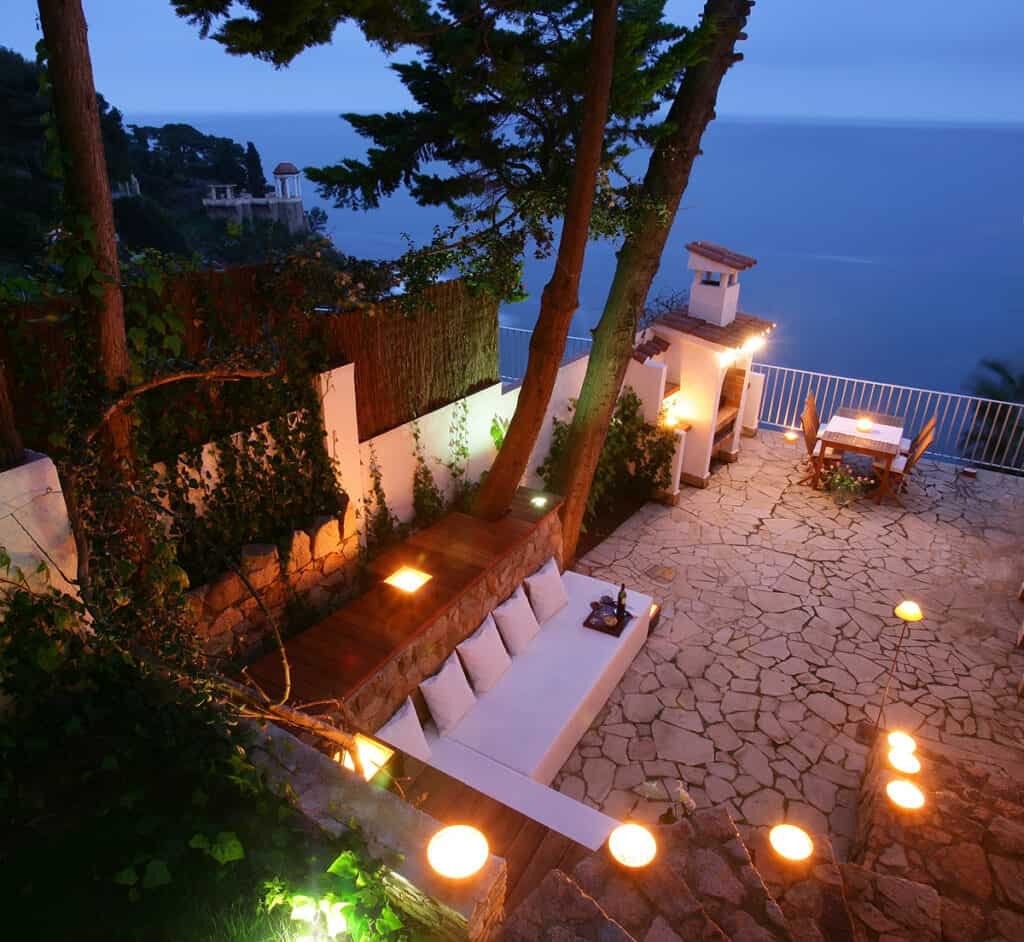
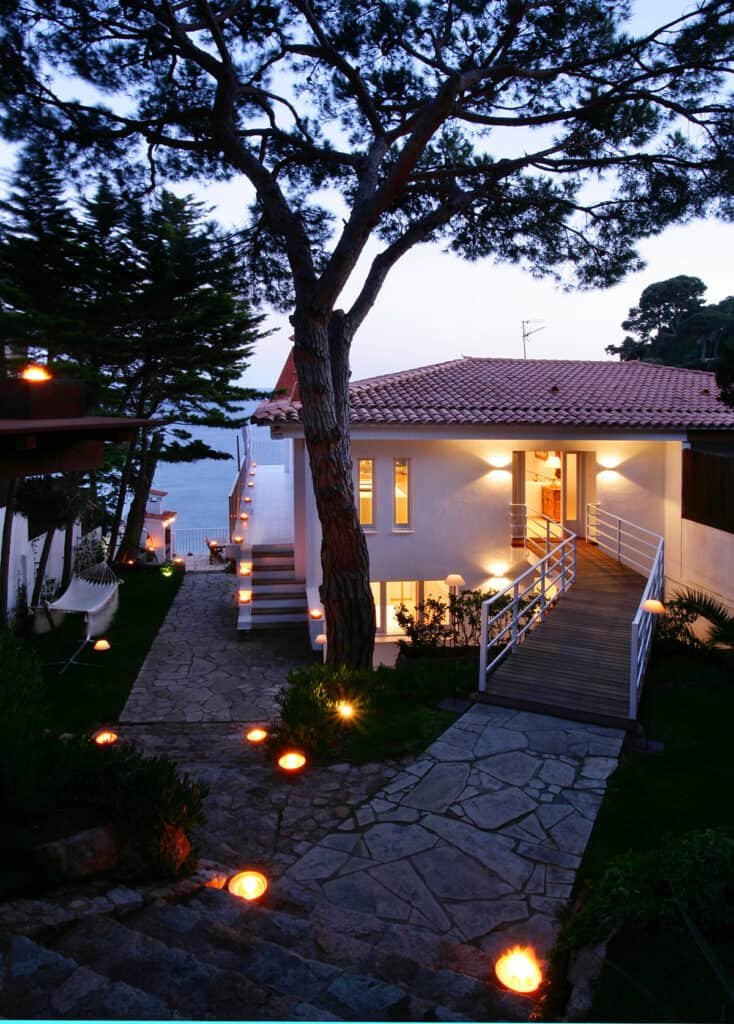
Dramatic outdoor twilight shots combining different color temperatures improve realism.
Editing and post production of real estate photos
This part is as important as the actual capturing of the images.
The goal is to create a realistic “3D” real estate photos with a good balance between highlights and shadows.
But it doesn’t mean going haywire with HDR’s and far-fetched Photoshop retouching.
Creating HDR images could be very tempting but it has to be well executed to not look fake and unnatural. Adobe Photoshop Raw or Adobe Lightroom is my first choice for editing Raw images.
It has all the parameters you’ll need to get the best out of each shot.